That feeling of dread during a heavy downpour is something many Okanagan homeowners know all too well. You hear the rain against the windows and immediately wonder if your basement is staying dry. A reliable sump pump is your home’s first line of defense, a silent guardian that works to prevent a costly flood. But its effectiveness depends entirely on a correct installation. This guide is designed to walk you through the essential steps of a sump pump installation, from choosing the right model for our region’s unique spring thaws to understanding the local codes in Kelowna and Vernon. It will give you the confidence to know your basement is protected.
Key Takeaways
- Choose a system built for the Okanagan: Your sump pump needs to handle our region's specific challenges, including heavy spring thaws and hard water mineral buildup, so consider a submersible pump with a battery backup for the best protection.
- Prioritize safety and code compliance: Sump pump installation involves electrical and drainage work that falls under local BC regulations, so hiring a certified professional is the safest way to protect your home and ensure the job is done right.
- Make maintenance a simple habit: Prevent pump failure by regularly testing your system with a bucket of water to check the float switch and cleaning the pit to remove sediment, which is a common issue in the Okanagan.
Why Your Okanagan Home Needs a Sump Pump
If you live in the Okanagan, you know our beautiful region comes with unique challenges, from heavy spring thaws to mineral-rich water. A sump pump is one of the best lines of defense for your home, especially for properties in Kelowna, Vernon, or Penticton with basements or crawlspaces. It’s a small investment that protects your foundation, prevents costly water damage, and gives you incredible peace of mind. Think of it as your basement’s personal bodyguard, always on watch for excess water so you don’t have to be.
How a Sump Pump Protects Your Basement
At its core, a sump pump is a simple but powerful tool. It sits in a specially constructed pit, called a sump pit, at the lowest point of your basement or crawlspace. As groundwater levels rise or water seeps in around your foundation, it flows into this pit. Once the water reaches a certain level, a float switch activates the pump, which then pushes the water out of the pit and away from your home through a discharge pipe. This system helps keep your basement or crawlspace dry by automatically managing water before it can become a flood, protecting your belongings and preventing mold growth.
Local Flood Risks: Spring Thaw & Heavy Rain
Here in the Okanagan Valley, we see dramatic seasonal shifts that can put any home’s foundation to the test. The rapid snowmelt in spring can saturate the ground, creating immense pressure on your basement walls. Add in the occasional heavy rainfall, and the risk of water intrusion becomes very real. Even a single flooding incident can cause lasting structural damage and expensive repairs. A professionally installed sump pump is your best defense against these local flood risks, ensuring that whether it’s a sudden downpour or the annual thaw, your home stays protected.
How Okanagan's Hard Water Affects Your Pump
The Okanagan is known for its hard water, which has a high mineral content. While you might notice it on your faucets, it also affects your plumbing systems. Over time, sediment and mineral deposits from our clay-rich soil can build up in the sump pit. This debris can interfere with the pump’s most critical component: the float switch. A stuck float switch is one of the most common reasons for pump failure in our area, preventing it from turning on when you need it most. Because of this, professional sump pump maintenance is even more critical here than in other parts of BC to ensure your pump is ready for action.
Choose the Right Sump Pump for Local Conditions
Choosing the right sump pump is the first and most important step in protecting your basement from water damage. It’s not a one-size-fits-all decision, especially for homeowners in the Okanagan. Our region’s heavy spring thaws and sudden downpours mean your pump needs to be reliable and ready for action. The right setup involves more than just picking a pump off the shelf; it’s about matching the equipment to your home’s specific needs and the unique challenges of our local environment.
Three key factors will guide your choice: the type of pump (submersible or pedestal), whether you need a battery backup, and ensuring the pump and pit are sized correctly. Getting these details right from the start will save you a lot of headaches and potential expenses down the road. A well-chosen system provides peace of mind, knowing your basement is protected from moisture and flooding, no matter what the weather in Kelowna or Vernon throws your way. While this guide will walk you through the options, if you're ever unsure, the experts at TruFinity Plumbing Heating & Cooling can assess your home and recommend the perfect system for you.
Submersible vs. Pedestal Pumps
When you start shopping, you’ll see two main types of sump pumps: submersible and pedestal. A submersible pump, as the name suggests, sits down inside the sump pit, fully submerged in water. This design makes it much quieter and keeps it out of sight. Because the motor is sealed and cooled by the surrounding water, it’s also less likely to overheat during heavy use.
A pedestal pump has a long column with the motor sitting on top, out of the water. While they are sometimes easier to access for service, they are noticeably louder and can be a tripping hazard in a busy basement. For most homes, especially those with finished basements where noise is a concern, a submersible pump is the preferred choice. It offers a cleaner, quieter, and often more efficient solution for keeping your basement dry.
Why You Need a Battery Backup System
Think about the worst-case scenario: a major storm rolls through the Okanagan, knocking out the power. This is often the exact moment when heavy rain is overwhelming your drainage system, and it’s precisely when your standard, electricity-powered sump pump becomes useless. Without power, your primary pump can’t run, leaving your basement vulnerable to flooding. This is where a battery backup system becomes an absolute necessity, not just a nice-to-have feature.
A battery backup is a secondary pump that runs on a dedicated battery. It automatically kicks in if the power goes out or if your main pump fails or can't keep up with a sudden influx of water. Investing in one provides a critical layer of protection and ensures your basement stays dry during power outages, giving you invaluable peace of mind.
Size Your Pump Correctly
Properly sizing your sump pump and pit is vital for it to work effectively. A pit that’s too small can cause the pump to turn on and off too frequently (a problem called short-cycling), which wears out the motor. A pit that’s too large might not allow water to trigger the pump soon enough. A good sump pump installation guide will tell you that an ideal sump pit should be at least 22 inches deep and about 18 inches wide. This gives the float switch enough room to move freely and function correctly.
Equally important is the base of the pit. The pump should never sit directly on dirt or gravel, as it can suck up debris and clog the system. Instead, it needs a hard, flat bottom, like a few bricks or a concrete paver, to rest on. This simple step protects the pump and extends its lifespan.
Gather Your Tools and Materials
Getting organized is the first step to any successful home project. Before you start digging, taking a moment to gather all your tools and materials will make the installation process much smoother and safer. While a straightforward sump pump replacement can be a manageable DIY task for some, having the right equipment is non-negotiable. This ensures the job is done correctly and your basement stays protected. TruFinity Plumbing Heating & Cooling always starts a job with a full inventory check, and you should too.
Your Tool and Safety Gear Checklist
Let’s get your toolkit ready. Having everything on hand before you begin saves you from making extra trips to the hardware store with a half-finished project in your basement. You’ll want to create a clear workspace and lay out your gear.
Here’s a basic checklist of what you’ll need:
- A new sump pump and check valve
- Drill with a 3/16-inch bit
- Hacksaw or PVC cutter
- PVC primer and cement
- Adjustable pliers and a pipe wrench
- A bucket and a shop-vac for cleanup
- Zip ties
- Safety gloves and eye protection
This list covers the essentials for a standard replacement. Remember to always read the manufacturer’s instructions for your specific pump model, as it may require additional tools.
Sump Pump Parts and Piping
The pump itself is just one part of the system. The piping is what safely moves water out of your basement and away from your home’s foundation. You will need to install a discharge pipe that leads from the pump to the exterior of your house. A crucial component for this pipe is a check valve. This one-way valve is essential because it prevents water from flowing back into the sump pit after the pump shuts off. Without it, your pump would have to work much harder, cycling on and off to pump out the same water. It’s also a good practice to drill a small "weep hole" in the discharge pipe just above the pump to prevent air from getting trapped and causing an air lock.
Consider Smart Upgrades
For extra peace of mind, especially during the Okanagan’s unpredictable storms, you might want to add a few upgrades. A battery backup system is one of the most valuable additions you can make. Power outages often happen during heavy rain, which is exactly when you need your sump pump the most. A battery backup ensures your pump keeps running even if the power goes out, providing a critical defense against flooding. You can also install a sump pump alarm, which will notify you if the water level gets too high, giving you a heads-up about a potential failure. Integrating these systems can be complex, so if you want a foolproof setup, our team can help you explore your plumbing service options.
Know the Rules: BC Building Codes & Permits
Before you grab a shovel, it’s important to understand that installing a sump pump isn’t just a simple weekend project. It involves plumbing, electrical work, and local regulations that you need to follow to keep your home safe and your insurance valid. Getting this part wrong can lead to major headaches, from failed inspections to the very basement flood you were trying to prevent. In the Okanagan, where water tables can shift with the seasons, doing it right the first time is critical.
This isn't about creating red tape; it's about ensuring the system works reliably when you need it most. A properly installed pump that meets all local codes is your best defense against water damage. TruFinity Plumbing Heating & Cooling always ensures our work exceeds minimum code requirements, because your peace of mind is our top priority. Let’s walk through what you need to know about BC building codes and permits before you begin.
Key Electrical and Plumbing Codes
One of the first questions to answer is whether a sump pump is officially considered a plumbing fixture. The answer can vary, and it matters. In some areas, "sump pumps are considered plumbing fixtures and must be installed by licensed plumbers." This classification determines who is legally allowed to perform the installation. In British Columbia, any work on a drainage system typically requires a certified professional. Because a sump pump involves both electrical connections and drainage, it falls into a category best handled by a pro to ensure every part of the installation is compliant. This protects your home and ensures the work doesn't void your manufacturer's warranty.
Local Water Discharge Regulations
You can’t just pump water anywhere you want. Every municipality in the Okanagan, from Kelowna to Penticton, has rules about where you can discharge sump pump water. Usually, you cannot connect the discharge line to the sanitary sewer system, as this can overwhelm water treatment facilities during heavy rain. Instead, water must be directed to a storm sewer or onto your property far from the foundation. It's also wise to check on permit requirements. As some experts note, "Understanding these local regulations ahead of time helps you budget for these fees, ensuring your project runs smoothly." A quick call to your local city hall can clarify the rules for your specific property.
When a Professional Is Required by Law
While you might be tempted to install a sump pump yourself, it’s a job where professional expertise is invaluable and often required. Because the work involves both plumbing and electrical systems, a mistake can be dangerous. It is "highly recommended to hire a licensed plumber to ensure proper installation and avoid potential damage or insurance issues." A professional understands how to correctly wire the pump, install a dedicated GFCI outlet, and ensure the discharge plumbing is up to code. The team at Trufinity includes Red Seal Plumbers who are certified to handle every aspect of the job safely and correctly, giving you confidence that your basement is protected.
Your Step-by-Step Sump Pump Installation Guide
Installing a sump pump is a significant project that involves digging, plumbing, and electrical work. While it can be a rewarding DIY for a skilled homeowner, each step requires careful attention to detail to ensure your basement stays dry and safe. This guide breaks down the fundamental steps, but remember that local codes and your home’s specific layout can add complexity. If you ever feel unsure, especially with plumbing or electrical connections, calling a professional is the safest choice.
Step 1: Pick a Spot and Dig the Pit
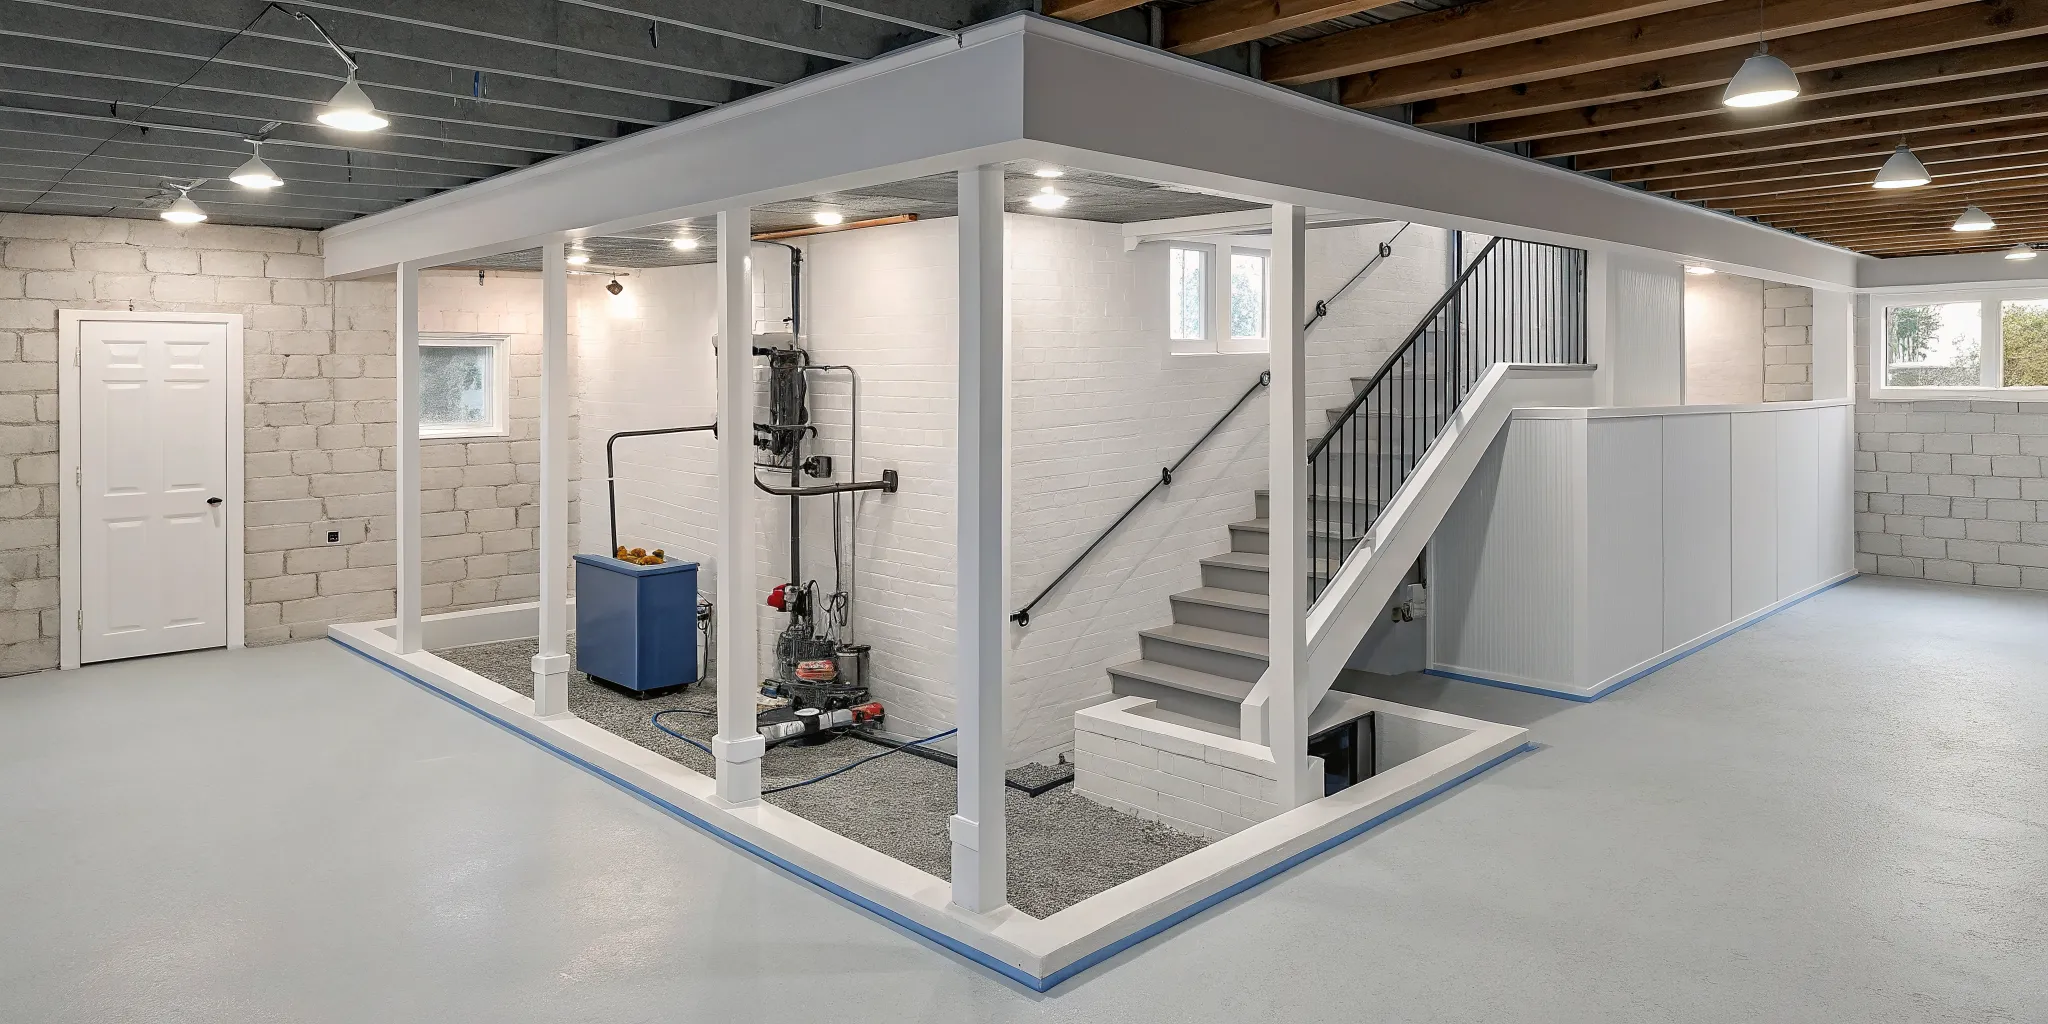
First, you need to find the right home for your sump pump. The ideal location is the lowest point in your basement or crawlspace, where water naturally collects. This spot should also be near an exterior wall for the discharge pipe and within reach of a GFCI (ground fault circuit interrupter) electrical outlet. Once you’ve marked your spot, it’s time to dig. You’ll need to break through the concrete floor, so be prepared with the right tools and safety gear. Dig a hole that is about 10 inches wider and 6 inches deeper than your sump pump liner. This extra space allows for a gravel base and ensures the pump fits comfortably.
Step 2: Set the Basin and Prepare the Base
With the hole dug, your next task is to create a stable and effective base for the pump. Start by pouring a few inches of gravel into the bottom of the pit. This gravel layer helps with water filtration and provides a solid foundation for the sump basin, also known as the liner. Place the liner into the pit, making sure its top edge is flush with the concrete floor. If your home has a perimeter drain system (weeping tile), you’ll need to connect it to the basin. This step is crucial for directing water into the pit, especially in areas like Rutland or West Kelowna where groundwater can be a persistent issue.
Step 3: Install the Pump and Connect the Discharge Line
Now you can place the sump pump inside the basin. Make sure it’s centered and not touching the sides, which could interfere with the float switch. Next, attach a PVC pipe to the pump’s discharge outlet. This pipe will carry water out of your home. A critical component to install on this line is a check valve. This one-way valve is non-negotiable; it prevents water from flowing back into the basin after the pump shuts off, which would cause the pump to cycle on and off continuously. Getting these plumbing connections right is key to a reliable system.
Step 4: Wire and Test Your System
The final step is to connect the power and test your work. Plug the sump pump’s cord into a dedicated GFCI outlet. This type of outlet is essential for preventing electrical shock in damp environments. With the pump plugged in, test the system by slowly pouring a few buckets of water into the basin. The float switch should rise with the water level and trigger the pump to turn on. Watch as it pumps the water out through the discharge line. Make sure the water is being directed at least six feet away from your home’s foundation. Once your system is tested, you can keep it running smoothly with our TruLoyalty+ Membership for annual inspections.
Avoid These Common Installation Mistakes
Installing a sump pump seems straightforward on the surface, but a few common mistakes can turn your weekend project into a costly disaster. Getting it right means protecting your home from water damage, but getting it wrong can lead to foundation issues, electrical hazards, or a pump that fails when you need it most. Before you start digging, it's worth knowing the most common pitfalls so you can avoid them. A successful installation is all in the details, and overlooking even one small step can have big consequences for your home, especially during an Okanagan spring thaw or a sudden downpour.
Think of this as your checklist for what not to do. Paying attention to these common errors will help you understand the complexities of the job and decide which parts you’re comfortable with and when it’s time to call in a professional from TruFinity Plumbing Heating & Cooling for peace of mind.
Incorrect Pit Sizing and Float Switch Errors
The location and size of your sump pit are critical. It must be installed at the lowest point in your basement or crawlspace to effectively collect water. If the pit is too small or not deep enough, your pump won't have the capacity to handle a heavy flow of water. A more common issue is a faulty float switch. This switch tells the pump when to turn on and off. If it gets stuck or isn't calibrated correctly, you could end up with a pump that runs constantly or, worse, doesn't turn on at all, leaving you with a working pump in the middle of a flooded basement.
Faulty Discharge Lines and Poor Drainage
A sump pump’s job is to move water out of your basement, but where that water goes is just as important. A frequent mistake is running the discharge line too close to your home's foundation. This creates a frustrating cycle where the water you just pumped out seeps back into the soil and right back into your sump pit. The discharge pipe must extend far enough to drain away from your house, ideally into a storm sewer if local regulations permit. Improperly routed lines can lead to expensive water damage and even compromise your home's foundation over time, turning a simple drainage issue into a major structural repair. If you suspect issues with your home's drainage, our team can handle all types of plumbing repairs.
Electrical Hazards and Skipped Tests
Your sump pump is an electrical appliance operating in water, so safety is non-negotiable. Never use an extension cord to power your pump. It needs its own dedicated, ground-fault circuit interrupter (GFCI) outlet to prevent electrical shock. Any wiring should be handled with extreme care, which is why tasks involving electrical connections are best left to certified professionals. Finally, don't skip the final test. Once everything is connected, pour a few buckets of water into the pit to ensure the float switch activates the pump and that it shuts off correctly after draining. Skipping this simple five-minute test means you won't know if it works until you’re already facing a flood.
Maintain Your Sump Pump Year-Round
Once your sump pump is installed, a little bit of maintenance is all it takes to ensure it’s ready to protect your home when you need it most. Think of it like changing the oil in your car; it’s a simple, proactive step that prevents major headaches down the road. For Okanagan homeowners, this is especially important given our unique seasonal shifts and notoriously hard water. A few checks throughout the year will keep your system running smoothly, giving you total peace of mind. Regular care helps you catch small issues before they turn into a flooded basement and an emergency call, saving you from stress and costly repairs.
This routine doesn't have to be complicated or time-consuming. It really just boils down to three key habits: performing seasonal inspections, preparing your system for winter, and knowing the signs that it’s time for a professional check-up or replacement. By following a simple schedule, you can extend the life of your pump and ensure it’s always prepared for a sudden downpour or the rapid spring thaw we see in the valley. Let’s walk through what that looks like, so you can feel confident your basement is protected year-round.
A Seasonal Inspection and Cleaning Checklist
A quick check-up each season is the best way to keep your sump pump in top shape. Start by unplugging the pump and looking inside the sump pit. Remove any dirt, gravel, or other debris that could clog the pump’s intake. A sturdy, well-fitting lid will help keep the pit clean between inspections. Next, plug the pump back in and test it by pouring a bucket of water into the pit. The float switch should rise with the water and activate the pump. The pump should turn on, drain the water, and shut off automatically. This simple test confirms everything is in working order. Finally, check the check valve on the discharge pipe to ensure it’s functioning correctly.
Prepare for Winter and Manage Hard Water Buildup
Here in the Okanagan, our hard water can be tough on plumbing. The high mineral content causes sediment to build up in the sump pit and on the pump itself, which can interfere with its operation. This makes annual cleaning more critical here than in milder climates. Before winter arrives, it’s also vital to inspect your outdoor discharge line. Make sure it’s clear of obstructions and angled away from your foundation to prevent water from pooling and freezing. An ice-blocked discharge line can cause water to back up, forcing the pump to overwork and potentially fail when you need it most. If you notice signs of mineral buildup or have concerns about freezing, our plumbing repair team can help.
Know When to Test and When to Replace
Testing your pump quarterly is a great habit, but it’s also important to know the lifespan of your equipment. Most sump pumps last between seven and ten years. If your unit is approaching that age, it’s wise to consider a replacement before it fails. The check valve, which prevents water from flowing back into the pit, often wears out sooner, around the five-to-seven-year mark. A small but critical component to check is the "weep hole," a tiny opening that prevents air locks. If this hole gets clogged, the pump can run without moving water and burn itself out. For proactive care without the guesswork, our TruLoyalty+ Membership includes annual inspections to keep your system reliable.
When to Call TruFinity for Professional Help
While this guide gives you a solid overview of sump pump installation, some jobs are simply better left to the professionals. Your home’s protection against flooding is too important to risk with a faulty installation. A small mistake can lead to thousands of dollars in water damage, foundation problems, and major headaches. For your peace of mind and to ensure the job is done right the first time, calling a certified expert is always the smartest move.
At TruFinity Plumbing Heating & Cooling, our goal is to provide "True Service, Infinite Care." That means making sure your home is safe and your equipment is reliable. Our team of licensed, Red Seal plumbers has the experience to handle any installation, from straightforward basement setups in Rutland to more complex systems for Lake Country acreage properties. We ensure every installation meets or exceeds code, giving you a dependable solution for years to come.
For Complex Installations That Require a Permit
Sump pump installation often involves more than just digging a hole; it’s a project that intersects with your home’s plumbing and electrical systems. Because of this, many municipalities require permits and inspections to ensure the work complies with local building codes. Some insurance policies even specify that a sump pump must be installed by a licensed plumber to maintain your coverage for water damage. A professional installation from Trufinity guarantees that all plumbing services are performed correctly and legally. Our certified technicians handle all the code requirements, so you don’t have to worry about compliance issues or potential insurance claim denials down the road.
For Emergency Repairs and Guaranteed Work
An improperly installed sump pump is a disaster waiting to happen. If the float switch is set incorrectly or the discharge line is faulty, your pump could fail during the next big Okanagan storm, leaving your basement vulnerable to flooding. Hiring a professional from TruFinity Plumbing Heating & Cooling mitigates these risks entirely. We stand by our work with a two-year labor warranty on repairs for members, and our technicians have the expertise to diagnose and solve problems correctly. If your current pump fails unexpectedly, our 24/7 emergency service means we’re always ready to help protect your home from water damage. Our long list of positive customer reviews speaks to our commitment to quality and reliability.
For Proactive Maintenance and Member Perks
Once your sump pump is installed, regular maintenance is key to its longevity and performance, especially with the Okanagan’s hard water, which can cause mineral buildup. To make this easy, we offer our TruLoyalty+ Membership program. Members receive annual maintenance checks to ensure their system is always ready for action. The membership also includes fantastic perks like priority scheduling, a 15% discount on repairs, and an extended two-year labor warranty. Instead of worrying about your pump every time it rains, you can relax knowing a Trufinity professional is keeping it in top condition. It’s the simplest way to protect your investment and your home.
Related Articles
- How to Replace a Zoeller Sump Pump
- Replacing a Sump Pump? A Step-by-Step YouTube Guide | TruFinity
- Can I Replace My Own Sump Pump?
Frequently Asked Questions
Can I install a sump pump myself? While it's possible for a homeowner with significant plumbing and electrical skills to install a sump pump, it's a job with very little room for error. The installation involves breaking concrete, making watertight plumbing connections, and ensuring safe electrical wiring. A mistake can lead to flooding, electrical hazards, or even void your home insurance coverage for water damage. For safety and peace of mind, we always recommend having a certified professional like the Red Seal plumbers at TruFinity Plumbing Heating & Cooling handle the installation.
Is a battery backup system really necessary? In short, yes. Think about when your sump pump is most likely to be working its hardest: during a heavy storm. Unfortunately, major storms are also the most common cause of power outages. A battery backup system is your insurance policy, ensuring that if the power goes out, a secondary pump will automatically take over and keep your basement dry. For Okanagan homeowners, it's an essential layer of protection.
How often should I test my sump pump? A good rule of thumb is to test your sump pump quarterly, or about once every three months. You can do this easily by pouring a bucket of water into the sump pit until the float switch rises and activates the pump. You should also schedule a professional inspection once a year. An expert can clean the system, check for wear, and address any mineral buildup from our region's hard water, ensuring it's reliable for years to come.
What does a sump pump installation cost? The cost of a professional sump pump installation can vary quite a bit. The final price depends on the type of pump you choose (submersible vs. pedestal), whether you include a battery backup, and the complexity of the job. For example, installing a system for the first time requires digging a pit and running new plumbing, which is more involved than simply replacing an old pump. The best way to get an accurate number is to schedule a consultation so we can provide a quote tailored to your home's specific needs.
My sump pump alarm is going off. What should I do? First, don't panic. An alarm is designed to give you an early warning. Safely check to see if the pump has lost power or if the circuit breaker has tripped. If the water level in the pit is high and the pump isn't running, it's time to call for help. This is considered an emergency, so you should contact a professional right away. TruFinity Plumbing Heating & Cooling offers 24/7 emergency service to help you protect your home when you need it most.


.webp)