That quiet hum from the corner of your basement is one of the most reassuring sounds in your home, especially when the Okanagan skies open up. But when that hum turns into a grinding noise or, worse, silence, a little bit of panic can set in. A failing sump pump is a direct threat to your basement, your belongings, and your peace of mind. It immediately brings up the big question: can I replace a sump pump myself? For many handy homeowners, the answer is yes. This guide is designed to help you make that call confidently. We’ll walk through the signs of a failing pump, the tools you’ll need for the job, and the critical safety steps to follow. We’ll also be honest about when it’s smarter and safer to call in a professional.
Key Takeaways
- Assess your skills before you start: A DIY replacement is manageable if you're comfortable with basic plumbing and electrical work, but it's best to call a professional for emergencies, complex setups, or if you're unsure about creating a perfect, leak-proof seal.
- Focus on three critical installation details: For a reliable installation, you must select the right size pump for your home's needs, install a check valve to prevent water from flowing back into the pit, and position the float switch so it can move freely.
- Perform simple maintenance for long-term protection: Your new pump needs regular attention to work properly. Test it every few months by pouring water into the pit, and keep the inlet screen and outdoor discharge pipe clear of debris to prevent clogs.
What Is a Sump Pump and Why Do You Need One?
If you live in the Okanagan, you know how quickly the weather can turn, bringing heavy rain or rapid snowmelt. Think of a sump pump as your home's first line of defense against basement flooding. It’s a small but mighty pump installed in the lowest part of your basement or crawlspace, inside a specially constructed pit called a sump basin. Its one job is to kick into action when water levels rise, pumping excess water away from your house before it has a chance to cause damage.
For many homeowners in Kelowna, Vernon, and beyond, a sump pump isn't just a nice-to-have—it's essential. It protects your foundation from hydrostatic pressure, prevents moisture that leads to mold and mildew, and safeguards your belongings and finished basement from water damage. A reliable sump pump provides peace of mind, especially during those spring thaws or heavy downpours. It’s a proactive solution that works quietly in the background to keep your home safe and dry.
How a Sump Pump Protects Your Home
A sump pump system is elegantly simple. As groundwater levels rise or rainwater seeps into the ground around your foundation, it’s channeled into the sump pit. The pump has a float switch, much like the one in your toilet tank, that rises with the water level. Once the water hits a certain point, the switch activates the pump, which then directs the water out of the pit and away from your home through a discharge pipe. This automatic process ensures your basement stays dry without you having to lift a finger, preventing the kind of water damage that often leads to complex plumbing repairs.
Common Sump Pump Types
Not all sump pumps are created equal, and the right one for you depends on your home's specific needs. The most common type is the submersible pump, which sits directly inside the sump pit. It’s quiet, powerful, and out of sight. Then there’s the pedestal pump, where the motor sits on a pedestal above the pit, making it easier to access for service but a bit louder. For ultimate protection, a combination system includes a primary electric pump and a battery backup pump that takes over during a power outage—a smart choice for anyone who’s experienced a storm that knocked out the power. Finally, there are water-powered pumps that use your home's water pressure to operate, offering another reliable backup option.
Signs Your Sump Pump Is Failing
Your sump pump is a quiet hero, working behind the scenes to protect your basement from flooding. But like any hard-working appliance, it won’t last forever. The good news is that most sump pumps give you a few warning signs before they quit for good. Catching these clues early can save you from a water-logged disaster and a major headache.
Paying attention to how your pump sounds and looks can help you decide if a repair or replacement is on the horizon. If you notice any of these red flags, it’s time to take a closer look and figure out your next steps.
Key Performance Warnings
The first signs of trouble often come from changes in your pump's behavior. If you're home during a heavy rainstorm, listen for how the pump is operating. A pump that runs constantly or cycles on and off too frequently can signal a problem. A pump that runs nonstop might not be powerful enough for the amount of water coming in, while one that turns on and off every few minutes could be a sign of a faulty switch or an oversized pump that’s short-cycling. Loud or unusual noises like grinding, rattling, or gurgling are also clear indicators that internal parts are failing and you should consider a replacement.
Visible Signs of Wear and Tear
Sometimes, a quick visual inspection is all you need to spot a problem. Take a look at the unit itself. Do you see any rust or corrosion? These are common signs of a failing sump pump that can compromise its housing and lead to failure. Also, check the age of your system. Most sump pumps have a lifespan of about 10 years. If your pump is older than that, it’s living on borrowed time and is much more likely to fail when you need it most. Proactively replacing an older unit is one of the smartest moves you can make to protect your home and avoid emergency plumbing repairs.
Can You Replace a Sump Pump Yourself?
The short answer is yes—if you're comfortable with some basic plumbing and electrical work, replacing a sump pump is a project many homeowners can handle. It’s a popular DIY task, especially if you're simply swapping an old pump for a similar new model. For those who are a bit handy, it can often be done in an hour or two, saving you the cost of a professional installation.
However, this is one job where precision is key. Your sump pump is your basement's main line of defense against flooding, and a small installation mistake can lead to significant water damage down the road. The project involves working with both water and electricity, a combination that always requires extra caution. Before you decide to take this on, it’s important to honestly assess your skills and make sure you have the right tools and materials ready to go. Let's break down what you'll need to make an informed decision.
The Skills You'll Need for the Job
For a successful DIY replacement, you should be comfortable with the fundamentals of both home plumbing and electrical safety. The job typically involves cutting and fitting PVC pipes, applying primer and cement, and ensuring every connection is perfectly watertight to prevent leaks. You will also need to safely handle the electrical connection for the new pump. While the task can be quick, it’s one that requires careful attention to detail. If you have any doubts about getting a perfect seal on your pipes or working with wiring, calling in a professional is the safest choice.
Your DIY Tool and Materials Checklist
Getting organized before you start is the key to a smooth and safe replacement. First and foremost, read the user manual for your new pump to understand its specific parts and installation steps. The most critical safety step is to always disconnect the power to the old pump at the circuit breaker before you touch anything.
Here’s a general list of what you’ll likely need:
- A new sump pump and check valve
- PVC pipe, primer, and cement
- A hacksaw or PVC cutter
- Adjustable wrenches or channel-lock pliers
- A tape measure
- A bucket to catch any remaining water
- A drill (if modifications are needed)
Having these items on hand will prevent frustrating mid-job trips to the hardware store. This sump pump installation guide also offers a great visual overview of the tools and process.
Safety First: Essential Precautions Before You Start
Before you roll up your sleeves and get to work, it’s crucial to prioritize safety. Replacing a sump pump involves working with water and electricity in a confined space, a combination that requires your full attention and respect. Taking a few key precautions not only protects you from injury but also prevents costly mistakes that could damage your home or your new pump. Think of these steps as the foundation of your project—get them right, and everything else will go much more smoothly. We’ll walk through the essential safety measures for handling the electrical components, preparing your work area, and using the right personal gear.
Handling the Electrical Work Safely
This is the most important step, so don't rush it. Before you do anything else, you must completely disconnect the power to the old pump. Start by unplugging it from the wall outlet. Then, go to your home’s breaker box and switch off the circuit that powers the sump pump. If the circuits aren't clearly labeled, you may need to test it to be certain. Never assume a pump is off just because it’s not running. It’s also important to know that a sump pump should always be plugged directly into a GFCI (ground fault circuit interrupter) outlet on its own dedicated electrical circuit. Using an extension cord is a serious fire and safety hazard.
Prepping Your Workspace
A clean and dry workspace is a safe workspace. If there’s standing water in the sump pit, you’ll need to remove it before you can get the old pump out. A wet-dry shop vacuum is the perfect tool for this job, but a small utility pump also works well. Once the water is gone and the old pump is out, take a moment to clean any mud, gravel, or debris from the bottom of the pit. This ensures your new pump can sit flat and operate without getting clogged. A clear, dry area around the pit also reduces the risk of slips and falls while you’re lifting the old pump out and lowering the new one in.
Wearing the Right Safety Gear
Protecting yourself is just as important as protecting your home. Sump pits can be grimy, so a good pair of waterproof work gloves is a must. They’ll give you a better grip on the wet pump and protect your hands from dirt and sharp edges. Because you’ll be leaning over the pit and dealing with potential splashes, you should also wear safety glasses or goggles. It’s a simple step that can prevent a serious eye injury from flying debris or dirty water. These basic pieces of personal protective equipment are essential for any home project, and this one is no exception.
When to Call a Professional Instead
While taking on a home project yourself can be incredibly rewarding, some jobs come with high stakes. A sump pump replacement is one of them. A small mistake can lead to a flooded basement and thousands of dollars in damage, turning a money-saving DIY into a costly disaster. Knowing when to step back and call in an expert is key. If you find yourself in any of the following situations, putting down the tools and picking up the phone is the smartest move you can make for your home and your peace of mind.
When the Plumbing or Wiring Gets Complicated
A sump pump connects to two of your home’s most critical systems: plumbing and electrical. This isn't like assembling a bookshelf. The job often requires cutting and fitting PVC pipes, ensuring watertight seals, and correctly wiring the pump to a GFCI outlet. It's best to "hire a licensed professional to avoid serious water damage from improper installation." Our Red Seal certified plumbers have the training to handle these connections safely and efficiently. They ensure your discharge line is properly routed and that all electrical components are installed to code, preventing the risk of leaks, electrical shorts, or premature pump failure.
If You're Facing an Emergency Flood
There is no worse time to learn a new skill than during an emergency. If your current pump has already failed and water is rising in your basement, the clock is ticking. The pressure of the situation makes mistakes more likely. As one homeowner noted, "If you make mistakes or work during heavy rain, there's a chance of water spilling into your basement." Don't risk it. This is the exact moment to call for professional help. TruFinity offers 24/7 emergency service across the Okanagan, because we know that disasters don’t wait for business hours. We can get a technician to you quickly to manage the situation and get a new pump working fast.
Dealing with Permits and Building Codes
Did you know that some plumbing and electrical work requires a permit to comply with local building codes? A professional plumber is your best bet for making sure everything is done by the book. As the experts at Harris Plumbing explain, licensed professionals "have the training and experience to ensure your system works well." Our team at TruFinity understands the specific codes and regulations in Kelowna, Vernon, and Penticton. We handle the installation correctly from the start, so you won’t have to worry about issues with a future home inspection or problems with your home insurance. It’s about giving you confidence that your home is protected.
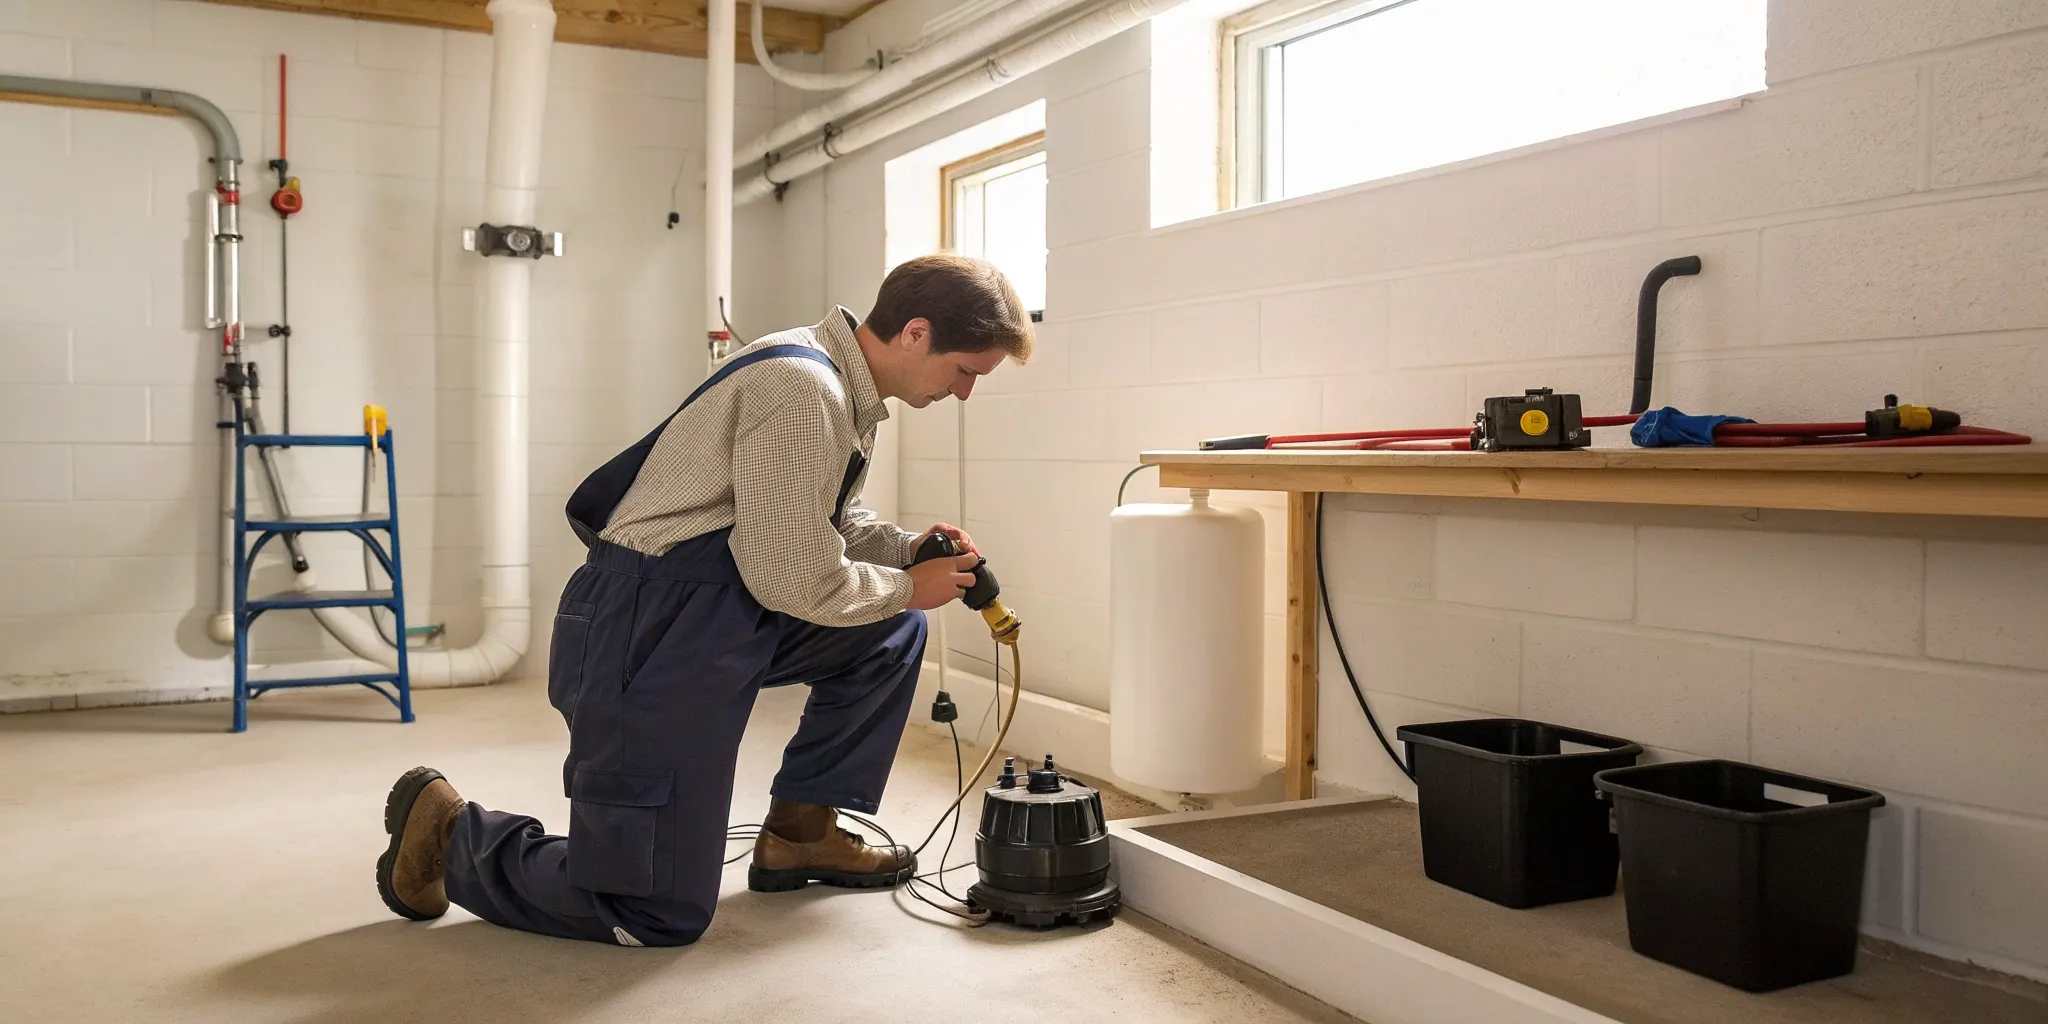
Your Step-by-Step Guide to DIY Sump Pump Replacement
If you’ve assessed the job and feel confident you have the right tools and skills, you’re ready to get started. Replacing a sump pump is a manageable project for many homeowners, as long as you follow the steps carefully and prioritize safety. This guide breaks down the process into four clear stages, from preparing your workspace to testing the final installation. Remember to work slowly and methodically to ensure your new pump is set up correctly to protect your home from water damage. With a little patience, you can have your new system up and running in an afternoon.
Step 1: Prepare for the Replacement
Before you touch the old pump, preparation is key. Start by reading the user manual for your new pump, as every model has slightly different requirements. The most important first step is always safety. Go to your circuit breaker and disconnect the power to the sump pump to eliminate any risk of electrical shock. Have a bucket and some old towels ready, as you’ll likely have some water to manage when you disconnect the old unit. Clear the area around the sump pit to give yourself plenty of room to work comfortably and safely.
Step 2: Safely Remove the Old Pump
With the power off, you can begin removing the old pump. First, unplug it from the wall outlet. Next, locate the check valve on the discharge pipe—this prevents water from flowing back into the pit. You’ll need to loosen the hose clamps holding the pipe to the valve. Once it’s loose, you can disconnect the discharge pipe from the pump. Now, carefully lift the old pump straight up and out of the pit. It will be full of water, so lift slowly and tilt it into your bucket to catch the excess and avoid making a mess on your basement floor.
Step 3: Install the New Pump
Now it’s time to install your new pump. Before placing it in the pit, attach the new discharge pipe adapter that came with it. Once it’s secure, gently lower the new pump into the basin. Make sure it sits perfectly flat and level on the bottom, away from the sides of the pit, so the float switch can move freely without getting stuck. Reconnect the main discharge pipe to the new pump’s adapter and securely tighten the hose clamps to prevent any leaks. A snug fit here is crucial for the pump to work effectively when it’s needed most.
Step 4: Test Your New Pump
The final step is to make sure your hard work paid off. Plug the new pump’s cord into the electrical outlet and restore power at the circuit breaker. To test the pump, pour a few buckets of water into the sump pit until the water level rises enough to lift the float switch. The pump should kick on automatically, drain the water from the pit, and then shut off as the float lowers. Testing the pump confirms that the installation is correct and that your basement is once again protected from potential flooding.
Common DIY Mistakes to Avoid
Replacing a sump pump can feel like a manageable weekend project, but a few common missteps can lead to a flooded basement and costly repairs. Even if you’re confident with DIY tasks, it’s easy to overlook a small detail that can cause the entire system to fail when you need it most. Knowing what to watch out for is half the battle. By avoiding these frequent errors, you can ensure your new pump is installed correctly and ready to protect your home.
Choosing the Wrong Size or Type
Not all sump pumps are created equal, and the first mistake is often grabbing the wrong one for your specific needs. The two main types of sump pumps are submersible and pedestal. More importantly, you need to match the pump’s horsepower to your home’s water situation. A pump that’s too weak won’t keep up with heavy water flow, while one that’s too powerful will cycle on and off too frequently, leading to premature motor burnout. Check the specifications on your old pump and aim to replace it with one of a similar capacity to handle your home's needs effectively.
Simple Installation Errors
Once you have the right pump, the installation itself presents a few hurdles. A critical but often forgotten component is the check valve. This one-way valve on the discharge pipe prevents water from flowing back into the pit after the pump shuts off. Forgetting it or installing it backward means your pump will work much harder than it needs to, shortening its lifespan. Another common error is improperly positioning the float switch. If it can’t move freely, it won’t signal the pump to turn on or off correctly. These small details are crucial for a reliable plumbing repair.
Avoiding Electrical Mistakes
Working with water and electricity requires extreme caution. The most dangerous mistake is failing to disconnect the power before you begin. Always turn off the circuit breaker connected to the sump pump before touching any wiring. Once you’re ready to connect the new pump, never plug it into an extension cord. Sump pumps require a dedicated, GFCI-protected outlet to operate safely and prevent electric shock. As this sump pump installation guide points out, reading your pump’s user manual is essential for specific electrical requirements and safety warnings.
How Much Does Sump Pump Replacement Cost?
Understanding the potential cost is a huge part of deciding whether to tackle a sump pump replacement yourself or call in a professional. The final price tag can vary quite a bit, but knowing the key factors will help you budget accordingly and avoid any surprises. Generally, you can expect the total cost to fall somewhere between $300 and $750. The biggest variable is labor—are you supplying it, or are you hiring an expert? Let's break down what goes into the cost so you can make the best choice for your home and your wallet.
Breaking Down the Costs: DIY vs. Pro
If you decide to replace the sump pump yourself, your main expense will be the new unit, which can range from $100 to over $400 depending on the model. When you factor in materials and potential tool rentals, the total project cost often averages around $527.
Opting for a professional installation means you're paying for both the pump and the expertise. The good news is that the labor for a straightforward replacement is often quite reasonable. Hiring a plumber typically adds less than $300 to the bill. This fee covers the technician's time, skill, and the peace of mind that comes with knowing the job is done right. At TruFinity, we provide clear, upfront pricing so you know the exact cost before we even begin.
What Influences the Final Price?
Several factors can shift the total cost of your sump pump replacement. The type of pump you choose is a big one; submersible pumps often cost more than pedestal models but are quieter and hidden away in the sump pit. The complexity of the installation also plays a major role. If your project requires removing a stubborn old pump, altering your existing plumbing, or upgrading electrical wiring, the labor time and cost will increase. Your location can also influence pricing. To manage these variables, we offer flexible financing options to make sure you can get the right solution for your home without financial stress.
Keeping Your New Sump Pump Working
Getting a new sump pump installed is a great first step toward protecting your basement from water damage. But like any important piece of equipment, it needs a little attention to keep it running reliably for years to come. Consistent maintenance is the best way to ensure your pump is ready to work when you need it most, helping you avoid the stress and cost of an emergency cleanup. By following a few simple routines, you can extend the life of your pump and maintain your peace of mind.
Your Regular Testing and Cleaning Checklist
Think of this as a quick health check for your sump pump. A few minutes of your time every few months can prevent a major headache later. First, test the pump by slowly pouring a bucket of water into the sump pit. The pump should turn on automatically, drain the water, and shut off. If it doesn't, you'll know there's an issue with the float switch or the pump itself. While you're there, unplug the pump and clean the inlet screen to remove any small stones, silt, or debris that could cause a clog. A clean pump is an efficient pump.
Essential Seasonal Maintenance
Your sump pump works hardest during the spring thaw and heavy rainfalls, so it’s smart to give it some extra attention before those seasons hit. Start by going outside and checking the discharge pipe. Make sure it’s clear of any obstructions like leaves, dirt, or ice that could prevent water from draining away from your foundation. Back inside, check that the pump is plugged into a working ground fault circuit interrupter (GFCI) outlet. Performing this kind of seasonal home maintenance helps ensure every part of the system is ready for action when the weather turns.
The Benefits of a Professional Tune-Up
While DIY checks are essential, having a professional inspect your sump pump annually is the best way to catch potential problems before they become emergencies. A certified plumber can spot things you might miss, like a failing check valve or subtle wear on the motor. During a professional tune-up, a technician will perform a comprehensive check of the pump, backup battery, and all electrical connections. This is also a great opportunity to ask questions and get expert advice. Our TruLoyalty Membership plans include annual plumbing evaluations to keep your entire system, including your sump pump, in top condition.
Need a Pro? Here’s How TruFinity Can Help
If you’ve weighed the options and decided that a DIY sump pump replacement isn't for you, that’s a smart call. Protecting your home from water damage is a big deal, and sometimes the best move is to bring in an expert for guaranteed peace of mind. At TruFinity, we live by our promise of "True Service, Infinite Care," which means we’re here to handle the tough jobs so you don’t have to. Our team is ready to provide professional, transparent, and reliable sump pump services across the Okanagan, ensuring your basement stays dry and your home stays safe. We combine expert craftsmanship with upfront pricing, so you know exactly what to expect before we even begin.
Guaranteed Work from Certified Experts
Installing a sump pump correctly involves a mix of plumbing, electrical work, and sometimes even concrete cutting. It’s a job where small mistakes can lead to big, costly problems. Our team consists of Red Seal certified plumbers who handle these installations regularly. We have the specialized tools and experience to ensure your new pump is sized correctly for your home, installed according to all local codes, and tested thoroughly. When you work with us, you’re not just getting a new pump; you’re getting the assurance that the job is done right. Plus, our TruLoyalty+ members receive a two-year labor warranty on repairs, giving you long-term confidence in our work.
24/7 Emergency Service Across the Okanagan
A failing sump pump rarely waits for a convenient time to give out. More often than not, it happens during a heavy downpour in the middle of the night. If you’re facing a potential flood, you don’t have time to watch DIY videos. That’s why we offer 24/7 emergency service in Kelowna, West Kelowna, Vernon, Penticton, and the surrounding areas. We commit to a 45-minute average response time for emergencies, so you can count on us to be there when you need us most. A quick, professional response can be the difference between a minor cleanup and a major restoration project, giving you invaluable peace of mind when every minute counts.
Related Articles
- Sump Pump Services Kelowna | TruFinity Plumbing
- 24-Hour Emergency Plumber
- How to Prevent Emergency Plumbing Situations
- How to Fix a Broken PVC Pipe Outside
Frequently Asked Questions
How long should my sump pump last? On average, you can expect a quality sump pump to last about 10 years. However, this can vary depending on how often it runs, the quality of the unit, and whether it receives regular maintenance. If your pump is approaching the decade mark, it’s a good idea to start thinking about a replacement before it fails during a storm.
What's the biggest risk if I mess up the DIY installation? The most significant risk is an installation failure that leads to a flooded basement. A small mistake, like an improperly sealed pipe or a stuck float switch, can prevent the pump from working when you need it most. This can result in thousands of dollars in water damage to your foundation, drywall, and personal belongings, which is far more expensive than a professional installation.
Do I really need a battery backup for my sump pump? While not strictly required, a battery backup is highly recommended, especially here in the Okanagan where storms can knock out the power. Your primary sump pump runs on electricity, so it's useless during an outage. A battery backup system automatically takes over when the power goes out, ensuring your basement stays dry during the most critical times.
How often should I test my sump pump to make sure it's working? A good rule of thumb is to test your sump pump every two to three months, and always before the start of the rainy or snowmelt season. Simply pour a bucket of water into the sump pit until the float switch rises and activates the pump. This quick check confirms that the pump turns on, drains the water, and shuts off properly, giving you confidence that it’s ready for action.
Is it better to repair or replace a failing sump pump? For minor issues on a relatively new pump, a repair might make sense. However, if your pump is over seven years old or has a significant mechanical problem like a failing motor, replacement is almost always the smarter and more reliable choice. The cost of a major repair can often be close to the price of a new unit, and a new pump gives you a fresh start with a full lifespan ahead of it.

.webp)